


Around The World: Icelandic Laufabrauð
I'm baking and painting my way around the world for my latest illustrated baking series - and next up we're off to Iceland for this magical treat!

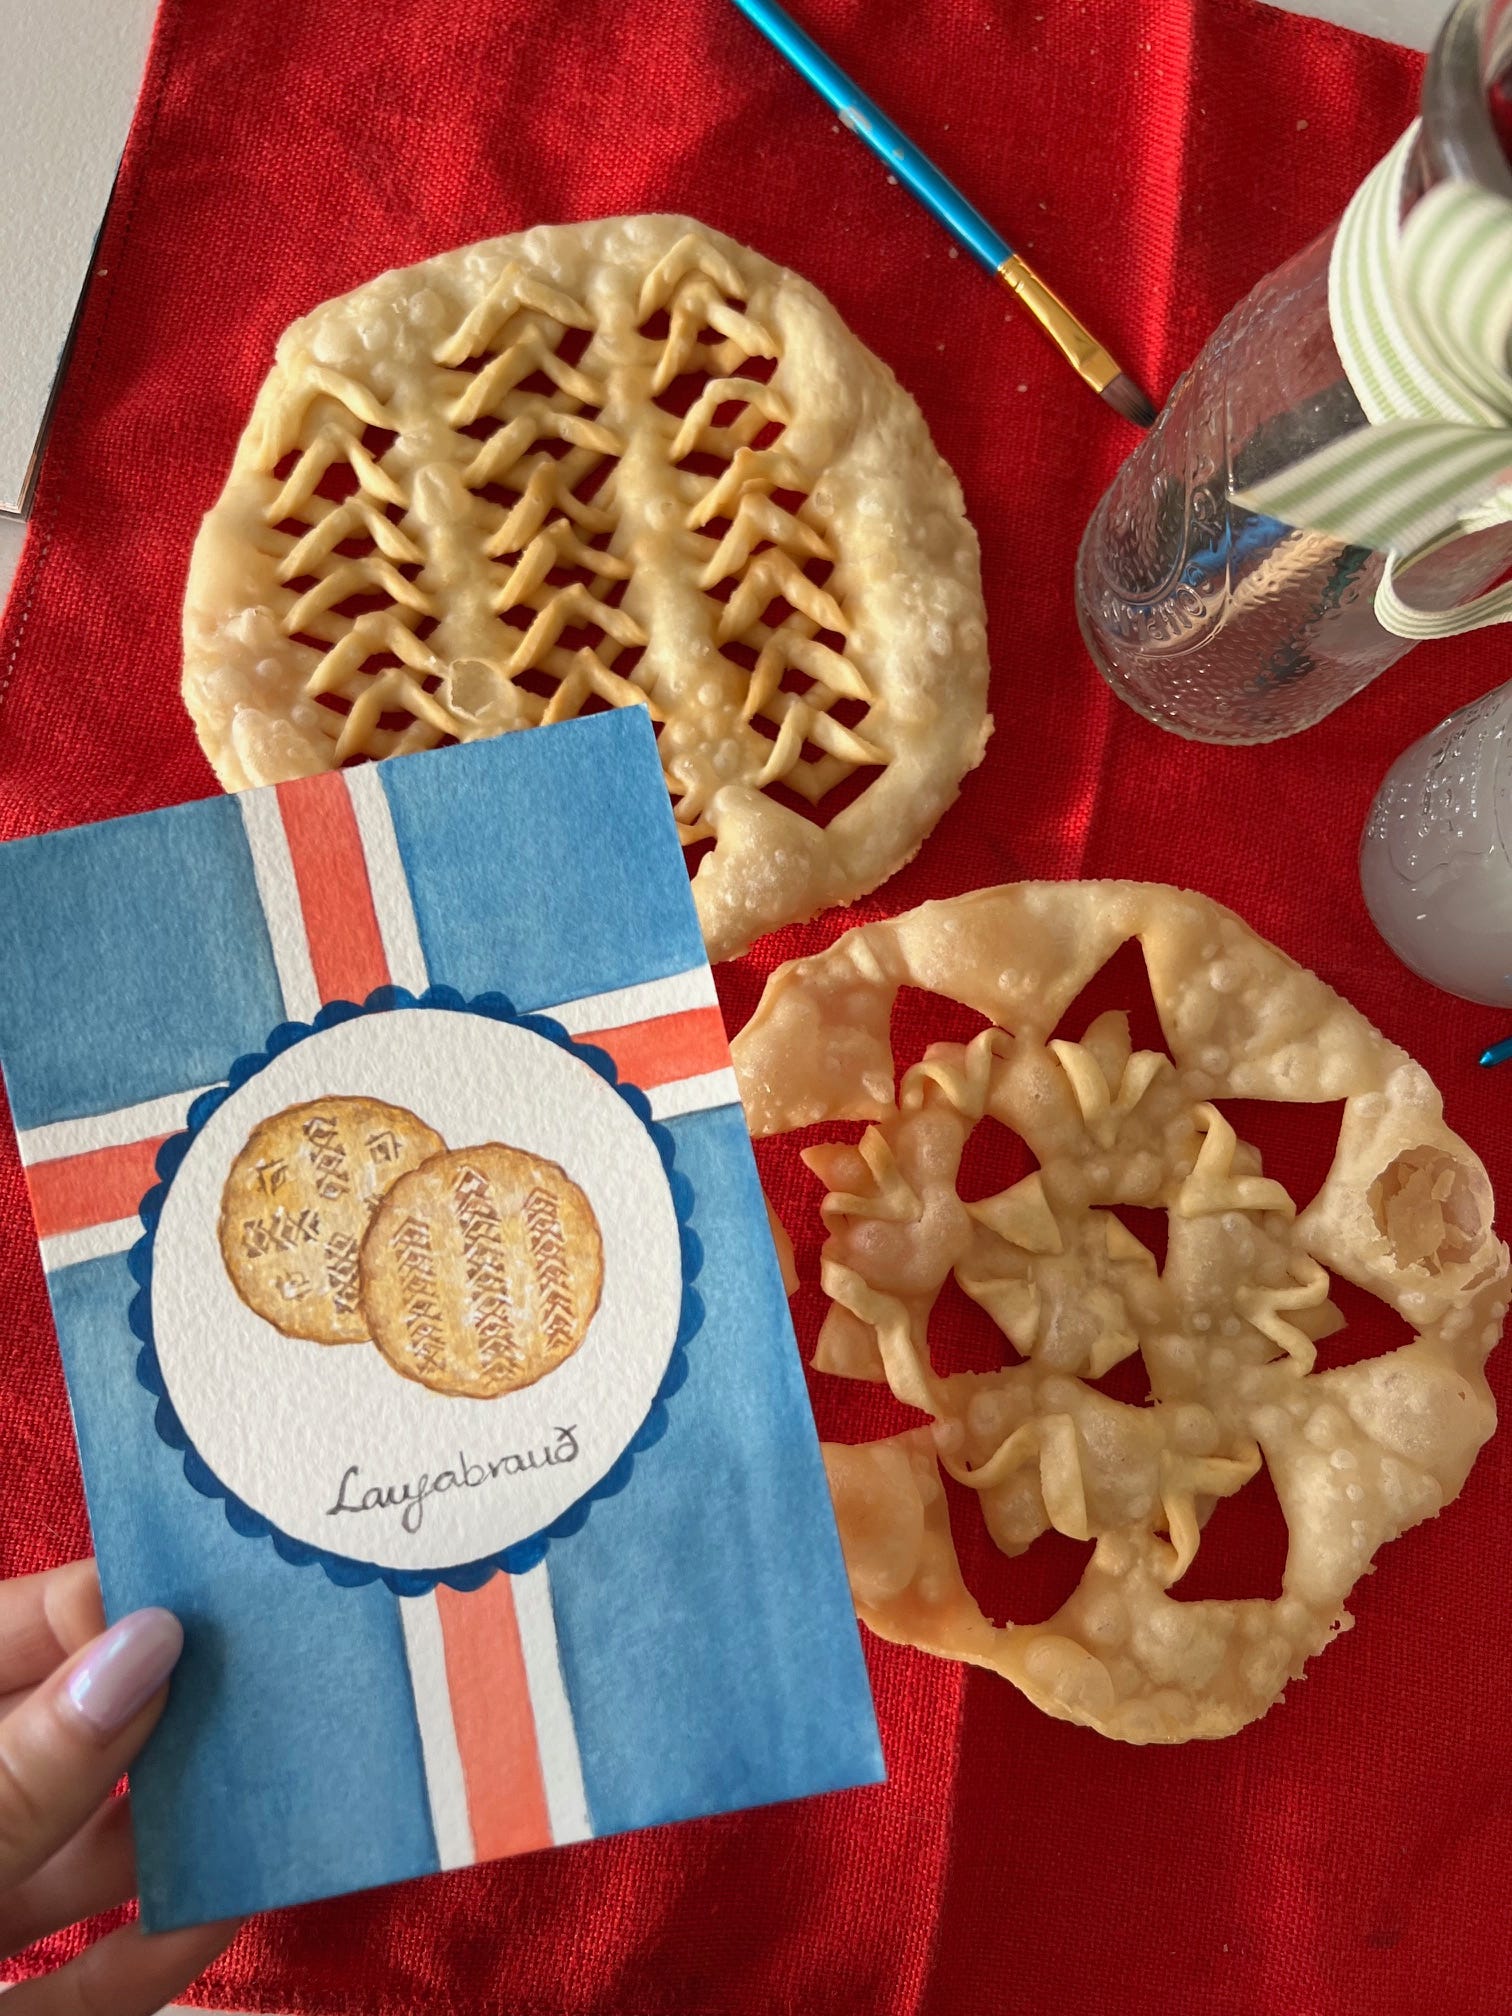
Laufabrauð: The Delicious Tradition of Iceland's Crispy Holiday Bread
I went to Iceland in 2008 on a school Geography trip, and it’s only now that I look back and realise how lucky I was. It’s such an amazing place, with the most dramatic landscapes and rich cultural heritage, but it’s also a country filled with unique traditions—many of which revolve around food! One such culinary gem is laufabrauð, considered to be one of the most national dishes. In fact, it is currently being considered for UNESCO's intangible cultural heritage list. Sadly I don’t think I tried it there as a teenager, but it is first on my list for if I’m ever lucky enough to go back! Let me tell you a little bit more about what makes this delicacy so special, and how to make them in case you fancy giving it a go!
What is Laufabrauð?
Laufabrauð translates to ‘leaf bread’ in English, a name that reflects the design of this thin, crispy bread that is traditionally deep-fried, and decorated with intricate geometric patterns that resemble leaves or floral designs. Laufabrauð has been a part of Icelandic Christmas celebrations for centuries, passed down through generations. It is said that during the long, harsh winters, families of early Icelandic settlers would prepare for the holiday season by making this intricate bread, which would be hung on the Christmas tree or placed on the table as part of the holiday feast. Apparently it’s usually served alongside other holiday favourites like hangikjöt (smoked lamb) and jólaöl (Christmas beer). Although I didn’t try these, in fact I just ate it on it’s own, and it was delicious and incredibly moreish as it was!
In earlier times, when resources were scare, laufabrauð was made by hand using just flour, water, and a little salt - simple ingredients that allowed people to create something both beautiful and delicious. Today, the recipe is similar, although many people now use a bit of sugar, milk and butter for extra richness, particularly when making it for festive occasions.
The intricate patterns carved into the bread aren’t just for aesthetics; they serve a practical purpose as well! The designs help the dough cook evenly when deep-fried, giving it that perfect crispy texture. There was something very satisfying about the way you could snap them! Some families even have their own special designs, passed down through the generations, making each piece of laufabrauð truly unique. Of course having never made them before, mine were unique in a less than ideal way - I think I did get the general feel for them, but from looking at pictures on the internet I have a long way to go before mine are as neat and beautiful as the real deal!
In my defence, I didn’t have the full equipment, I was using a knife and in Iceland they have specific tools (like in the photo below) to cut the dough very neatly. I also didn’t realise you’re meant to flatten them once they’re fried. But for a first attempt, I was quite please with myself.

Photo credit: Ariana Lindquist
The Magic of Laufabrauð
What stood out to me with this particular bake, was that what makes laufabrauð truly special isn’t just the taste or the texture; it’s the sense of tradition that comes with it. It is traditionally something that is made and enjoyed together, so it’s as much about the making and the meaning, as the eating. It really is a form of culinary creativity, so there’s something really magical about this Icelandic treat!
Make my Laufabrauð:
(makes about 16)
Ingredients:
100ml whole milk
45ml water
15g unsalted butter
175g plain flour
50g corn flour
1 tsp baking powder
1/2 tbsp caster sugar
Pinch of salt
Method:
Mix the flour, cornflour, baking powder, sugar and salt in a bowl.
Heat the milk, water and butter in a saucepan until the butter has melted, but don’t let it boil.
Pour into the bowl of dry ingredients and mix until combined nicely into a dough.
If necessary, ad a little more water, but it shouldn’t be sticky.
Knead for about 10 minutes until smooth, then cover and leave to rest for half an hour.
Divide the dough into 16 equal pieces, and roll each piece out as thin as possible, stretching it out.
Cut into 6 inch discs (I just cut around a cake tin) and use a knife to cut your geometric patterns, folding the pieces to form the designs.
Fry in the vegetable oil at 175 C on each side for around a minute or until blistered and slightly golden.
Drain on kitchen paper (and flatten with a plate if possible) and enjoy!

Tips for Success
Thinness is Key: The thinner the dough, the crispier and more delicate the laufabrauð will be. The dough will need rolling and stretching to get that good snap. Do a tester to see how it cooks.
Perfecting the Design: If you don’t have a special dough cutter for creating intricate patterns (which I’m guessing you don’t!) you can use a knife or even a fork to make simple designs. It doesn’t have to be perfect, each piece is unique and I just used some images for reference but just started cutting and seeing how they ended up!
Deep Frying: Be sure to maintain the oil temperature at around 350°F (175°C) for the best results. If the oil is too cool, the laufabrauð will absorb excess oil and become greasy. Too hot, and it might burn before it cooks through.
Storage: Once made, laufabrauð can be stored in an airtight container for several days, but it’s best eaten fresh!
Don’t forget to check out my other Illustrated Bakes from Around the World pages to learn more about different delicacies from all over the world, and the stories and recipes behind them!